So you heard about the health and sustainability benefits of eating insects and want to try entomophagy, huh? I had thought about doing this for years, so I embarked on an adventure to raise mealworms and make recipes from six different continents: Mealworm Tacos, Mealworm Lettuce Wraps, Mealworm-Meat Pie, and Cricket Flour Crepes. Not included are my recipes for arepas and couscous, both of which also turned out well but were too long to list. (If you're interested in them, feel free to contact me for the full recipes.)
Buying Your Insects
It turns out eating insects is really easy. First, you have to buy your insects online. Try and find a website like Rainbow Mealworms that has FDA approval for sale to humans.
I bought 5,000 live mealworms, not knowing how big or small mealworms would be, and it was too much for a week's worth of food. The amount of mealworms I received would fit inside a 2-liter bottle, and I'd suggest ½ cup per serving. Starting off with 2,000 mealworms as a single eater would probably be best, and use some, almost half that, to seed a colony. I used 750 to start a colony and froze the rest.
I also purchased cricket flour from Thailand Foods on Amazon Prime.
Raising Mealworms
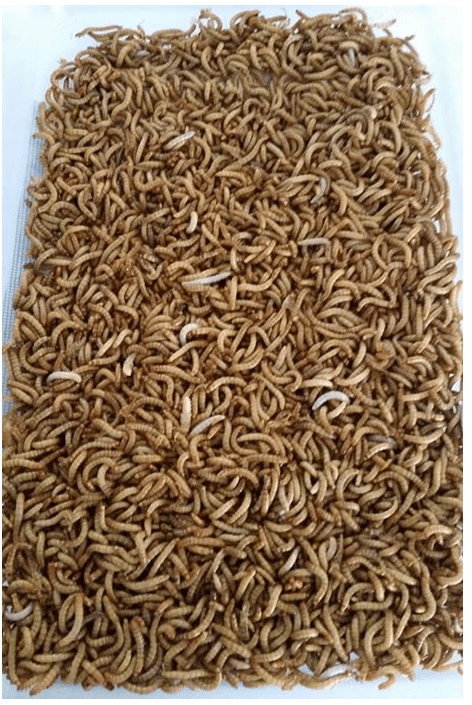
Mealworm colonies are incredibly easy to grow. They require three separate Tupperware or other containers with mesh sections cut out on the lids, oatmeal, and some vegetable (like carrots) to provide humidity. My roommate kindly cleared a shelf in our utility closet where ours are nestled, just above the vacuum cleaner.
Preparing Mealworms to Eat
To prepare mealworms, you should first purge them for 48 hours, kind of the same as gutting a shrimp. Just put healthy, wriggling mealworms in a container without food and leave them in a dark place for 48 hours. Then, freeze the mealworms for 1-2 days. When you pull them out to eat, make sure one last time that no injured or dead mealworms are in your mix (black is bad—white just means they molted right before death, and they are safe to eat). This is less work than it sounds! Finally, you must boil mealworms for 3 minutes to make sure they are clean of dirt or parasites before cooking.
I am forever grateful to this blog for being my introduction to preparing and eating insects. They also explain how to dehydrate mealworms, which I did not use for my recipes, but which may come in handy if you are trying to make, say, mealworm toffee. When I tried to make mealworm toffee, I flat out failed because it didn't set. A bug friend pointed out that it would work with dehydrated mealworms, but not the freshly frozen ones. So make sure you prepare your mealworms the right way for your recipe!
Are you hungry yet? Insects in hand? Time to start cooking!
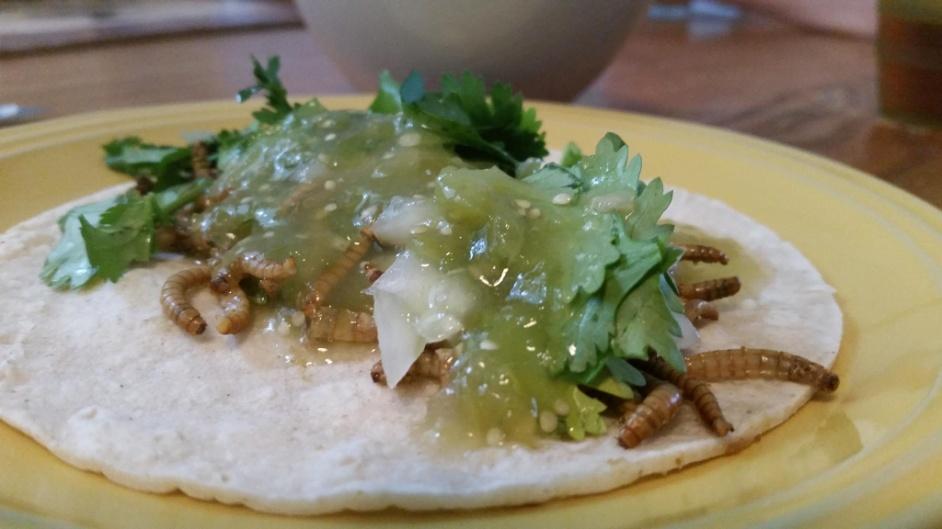
Mealworm Tacos
- Small corn tortillas
- 1 cup mealworms
- Cilantro
- ½ medium onion, chopped
- Lime for juicing
- 1 tsp cumin
- Tomatillo salsa
- Prepare mealworms by boiling in water for 3 minutes.
- Transfer prepared mealworms to a small dry skillet with lime juice and cumin. Heat through.
- At the same time, heat two corn tortillas, one on top of the other, together in a dry skillet for 2 mins, flipping halfway through.
- Assemble 1/3 cup mealworms on the tortilla pair, sprinkle on cilantro and onion to taste. Add salsa as desired.
Taste
This was by far the fastest, easiest recipe—I think it took me longer to cut the onion then make the taco. Most people use grasshoppers or crickets in tacos, but I don't like the flavor as much, so I wanted to try a taco with mealworms. Truthfully, they were not seasoned much. You could probably experiment with some more seasonings if you want, but I thought the salsa did enough on its own. You'll note that this recipe does not call for oil. It really didn't need it. I always make my own tomatillo salsa, but you can buy your own favorite salsa or pico de gallo and get the same effect. And yes, you really do need 2 corn tortillas for each taco, and you must heat them, or they'll crumble into pieces on you.
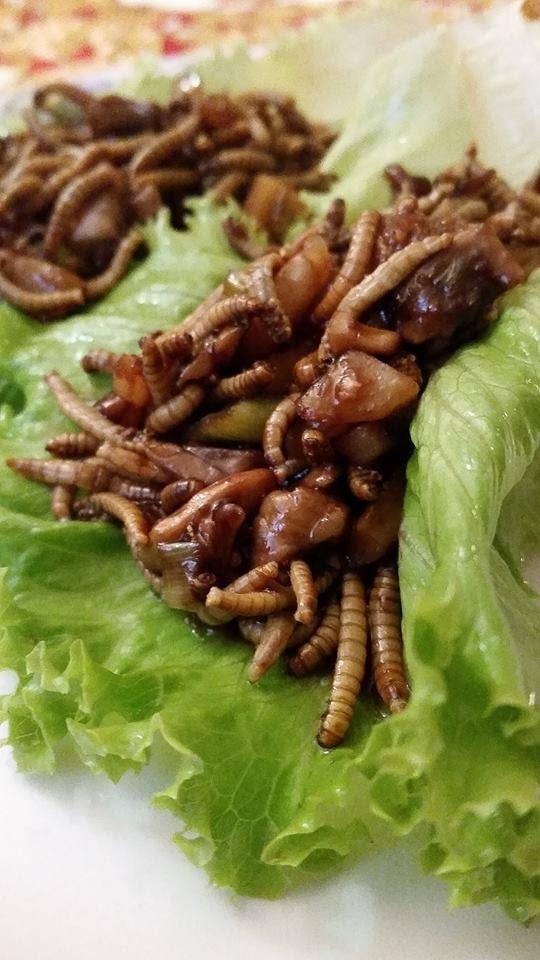
Asian Mealworm Lettuce Wraps
- 3 to 5 tablespoons hoisin sauce
- 2 tablespoons soy sauce
- 2 tablespoons rice wine vinegar
- 1 tbsp balsamic vinegar
- 1 teaspoon sesame oil
- 1 teaspoon cornstarch
- 2 cups raw, frozen mealworms
- 2 teaspoons vegetable oil
- 8 ounces mushrooms, chopped small
- 1 8-ounce can water chestnuts, drained and chopped in quarters (or buy sliced)
- 2 cloves garlic, minced
- 1-inch piece ginger, minced (about 1 tablespoon)
- 1/2 cup sliced green onions (from about 6 green onions), divided
- 2 small heads Bibb or butter lettuce
- Prepare mealworms by boiling them for 3 minutes, then strain.
- Heat the vegetable oil in a wok or large skillet over medium heat. Add the garlic and ginger and cook until fragrant, 1 minute.
- Add the mushrooms and sauté until cooked through, 3 minutes.
- Add the water chestnuts and cook for an extra minute.
- In a separate dish, whisk the first 5 ingredients together. Add this to the mushrooms and water chestnuts. Add the cornstarch and stir any clumps until they are incorporated. Add the mealworms and let cook until heated through, 2-3 minutes.
- Remove mixture from heat and toss with green onions.
- Spoon approximately 1/4 cup of the warm mixture on a clean, dry lettuce leaf, and eat as if it were a taco. Serves 2-3 for a meal.
Taste
The first time I ate mealworms, I thought, “This needs to go in a lettuce wrap.†I was most excited to try this recipe, and I was very pleased with how it turned out. The sauce provided a lot of flavor, and the mealworms gave a nice crunch to the lettuce wrap. This was also super easy to put together and eat, and would be a great option for a 15-minute meal.
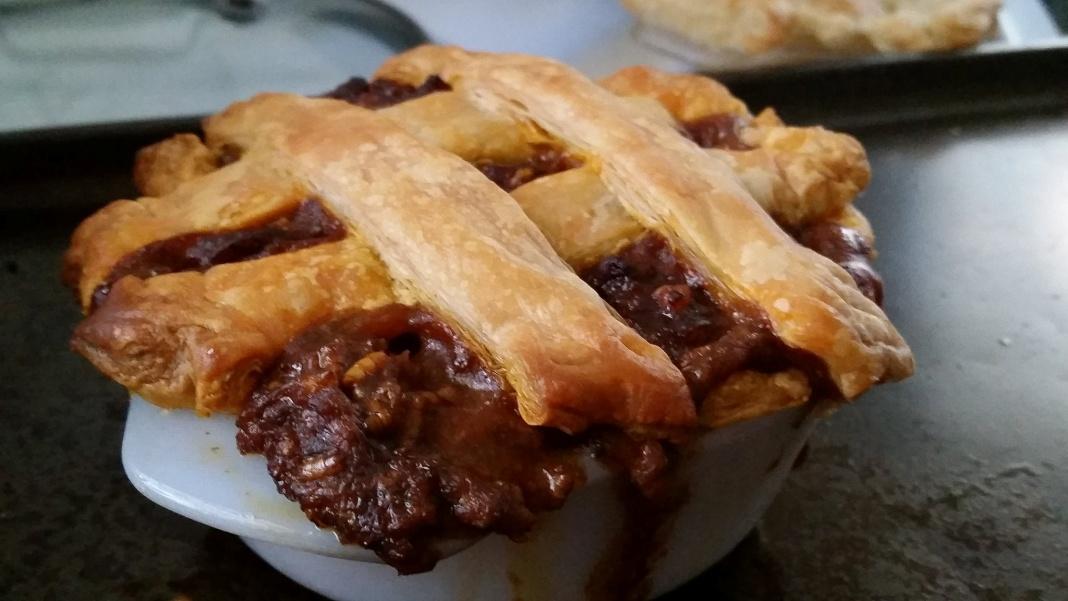
Australian Mealworm-Meat Pie
- 1/2 pound lean beef
- Roughly equal amount mealworms as beef
- 1 onion, chopped
- 1/2 cup beef broth
- ¼ cup ketchup
- 2 tsp Worcestershire sauce
- Oregano
- 2 puff pastry sheets
- Prepare mealworms by boiling in water for 3 minutes. Strain.
- Add the prepared mealworms to a blender with the beef broth. Pulse 3-4 times to break up mealworms, but not enough to look homogeneously blended. Set aside.
- Brown the beef, and cook the onion in the excess fat while it's browning. Remove any excess fat you can after.
- Add ketchup, Worcestershire sauce, and mealworm-broth mix to the browned meat.
- Simmer off some of the extra liquid. You may add some cornstarch if the mix isn't thick enough, but mine didn't need it.
- Season with oregano and let cool to the touch.
- Line a greased pie pan or similar oven-ready pan with one of the puff pastry sheets.
- Fill with the cool meat mixture, and top with the other puff pastry sheet, crimping the sides.
- Bake at 425°F for 15 minutes, then drop the oven temperature to 350°F and continue cooking for 20-25 more minutes until golden brown. If you are like me and overfilled your pie, put a nonstick pan underneath so that you don't have to clean your oven later when it boils over.
Taste
I am not the biggest fan of meatpies, but I wanted to try incorporating mealworms and meat together into a meal, and this seemed like a good place to start, not to mention being one of the only recipes I could find for Australia. First off, it had plenty of beef flavor just from being half beef, and this was actually very tasty despite me having the most doubts about it.
In my hunger, I totally forgot to both grease my pan and to let the meat-mealworm filling cool before adding it to the raw dough, and it still turned out alright. I was most impressed by the meat texture. I gently blended the mealworms because meatpies don't have a crunch, and I didn't notice them at all. This might get the award for least-noticeable use of mealworms.
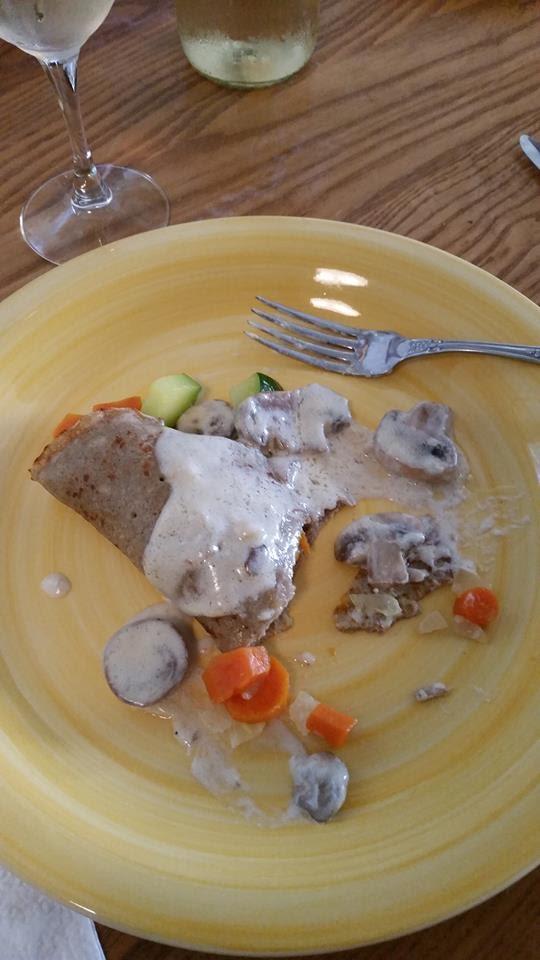
Zucchini- and Carrot-Filled Cricket Flour Crepes with Mushroom Sauce
Cricket flour crepes:
- 4 eggs
- 1 ½ cups milk
- 1 cup water
- 6 Tbsp butter, melted
- ½ tsp salt
- 1 ¾ cups flour
- ¼ to ½ cup cricket flour, to taste
Filling:
- 2 tbsp olive oil
- 2 zucchini
- 6 large carrots
- 1 large yellow onion
- Salt to taste
Mushroom sauce:
- 1/2 cup whipping cream (Half and Half if you want it a tad healthier)
- 2 tbsp butter
- 1/2 cup chicken or vegetable stock
- 8oz chopped mushrooms
- 2 tbsp flour
Crepes
- Mix dry ingredients ( salt, wheat flour, and cricket flour), then incorporate wet ingredients (eggs, milk, water, and butter). I normally add the melted butter right at the end and whisk the dickens out of it so it doesn't cook the eggs when it's added. You can also put all of it in a blender and blend if you don't feel like a forearm workout. The crepe batter should be left to develop gluten structure at least for 2 hours, but you can also make it the night before and leave it in the refrigerator overnight. It will separate and need a good whisk again when it's time to cook.
- To cook the crepes, heat a 12 inch, flat-bottomed pan over medium heat and grease with butter right before pouring in the crepe mixture. The butter should sizzle a lot; pour the batter on immediately before the butter browns too much.
- Use a ladle to pour ½ cup of the batter into the preheated pan, and swirl the pan so that the batter creates a crepe approximately 6-7 inches in diameter. I normally like larger crepes and can flip them, but the cricket flour affects the gluten structure and makes these harder to flip, so go for thicker, smaller crepes, and continue to grease your pan as needed.
The recipe will make enough crepes to feed a small army (around 5-6 servings—be sure to half it if you don't have company like I did). To keep crepes warm, simply place on a simple sheet of aluminum foil long enough to fold over to cover. Do not pinch the seams of the foil envelope or the crepes will get too moist.
Filling
- Chop your veggies into bite-sized pieces.
- Heat your oil in a large wok or skillet over medium heat until it shimmers.
- Add your onions and carrots to the skillet. After 5 minutes, add your zucchini. Be very careful to not overcook veggies, cooking them only 5-8 minutes more after adding the zucchini and tossing occasionally. Salt to taste.
Mushroom Sauce
- In a small sauce pan, slowly melt your butter on low heat. If your butter sizzles loudly, it's too hot. Do not let your butter burn for this step.
- When the butter is half melted, add the mushrooms, turning up the heat to low-medium. Sauté the mushrooms until they just start to change color, 3-5 minutes.
- Add the flour to the butter-mushroom mix, and scrape the browning flour bits off the bottom of the pan.
- Add your chicken or vegetable stock and cream. Bring to a low simmer and simmer until slightly thickened.
To assemble, put an open crepe on your plate, fill with the vegetable filling on one half, then fold the crepe back over, making a half moon, and pour the mushroom sauce on top.
The real trick to this recipe is getting all of the parts ready at the same time. I try to have all of my veggies chopped and ready to go before starting. I normally start sautéing them to slightly under what I want and flip off the burner because I am normally running behind at that point. It's best to get the mushroom sauce going early so it can simmer down while everything else is cooking, and the crepes should be done at the last minute.
This recipe is a go-to for me. It takes a while when you first make it, so be prepared, but it doesn't seem nearly as hard for me now as writing out the instructions make it seem.
Taste
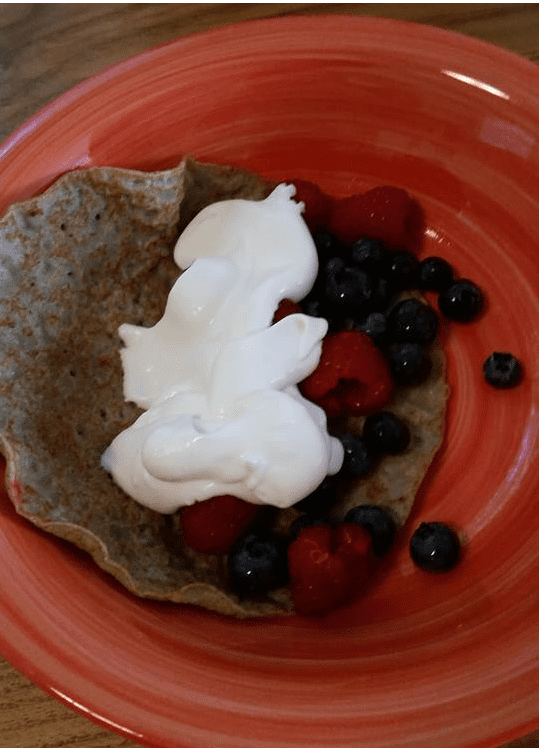
This was the first entomophagy recipe I tried, and I was nervous about the smell of the cricket powder, which I really don't care for, but the crepes tasted the same as “regular†crepes —delicious. I would make this again, but I might not leave it in my fridge overnight because it made the refrigerator smell a little, and I don't know how much gluten structure really formed around the cricket powder. The color of the crepes is grayish and a little off-putting, so don't skip out on the cream sauce. Go ahead and live a little with this recipe. It is certainly worth the effort. I had a friend over to try these, and she also enjoyed them but preferred when we added sugar to the little bit of batter left over and filled them with whipped cream and berries, but I found the cricket flavor a little too strong when they were sweet. Try both ways to see what you prefer.
All images courtesy of the author, Laura Kraft.
About the Author
 Laura Kraft is a Georgia native, having grown up in Alpharetta, Georgia. She is a joint Bachelor's/Master's student studying aphid endosymbionts under Dr. Kerry Oliver, looking for a PhD program outside the southeast to move to. When not in lab, you'll find her at one of a couple Spanish conversation tables around Athens or improving her amateur photography skills. Laura Kraft is a Georgia native, having grown up in Alpharetta, Georgia. She is a joint Bachelor's/Master's student studying aphid endosymbionts under Dr. Kerry Oliver, looking for a PhD program outside the southeast to move to. When not in lab, you'll find her at one of a couple Spanish conversation tables around Athens or improving her amateur photography skills. |
About the Author
- athenssciencecafehttps://athensscienceobserver.com/author/athenssciencecafe/April 17, 2020
- athenssciencecafehttps://athensscienceobserver.com/author/athenssciencecafe/April 12, 2020
- athenssciencecafehttps://athensscienceobserver.com/author/athenssciencecafe/April 3, 2020
- athenssciencecafehttps://athensscienceobserver.com/author/athenssciencecafe/March 30, 2020

